Planning an effective kitchen layout is crucial for creating a functional and enjoyable cooking space. By considering key elements like the work triangle, storage optimization, and proper ventilation, you can design a kitchen that not only looks great but also enhances your cooking experience. In this comprehensive guide, we’ll explore these essential aspects of kitchen design to help you create the perfect layout for your home.
The Kitchen Work Triangle
The kitchen work triangle is a fundamental concept in kitchen design that has stood the test of time. Developed in the 1940s, this principle aims to maximize efficiency by optimizing the placement of three key work areas: the sink, the stove, and the refrigerator. The work triangle concept has been a cornerstone of kitchen design for decades, and while modern kitchens may incorporate additional elements, the basic principle remains relevant and useful.
Understanding the Work Triangle
The work triangle is formed by imaginary lines connecting these three essential elements. The idea is that when these points are placed in close proximity to one another, the kitchen becomes more efficient and easier to use. Here are some guidelines to keep in mind when implementing the work triangle:
- Each leg of the triangle should measure between 4 and 9 feet.
- The total perimeter of the triangle should be between 13 and 26 feet.
- The triangle should not intersect with a kitchen island by more than 12 inches.
- Avoid placing major traffic routes through the triangle to minimize disruptions.
These guidelines are based on ergonomic studies and practical experience, aiming to reduce unnecessary movement and create a comfortable working environment. By following these principles, you can ensure that your kitchen layout promotes efficient movement between the primary work areas.
The Importance of Each Element in the Work Triangle
- The Sink: Often considered the busiest area in the kitchen, the sink is used for food preparation, cleaning, and washing dishes. Ideally, it should be centrally located and easily accessible from both the refrigerator and the stove.
- The Stove: As the primary cooking area, the stove should be positioned with safety and convenience in mind. Ensure there’s enough counter space on either side for food preparation and plating.
- The Refrigerator: The refrigerator should be easily accessible not only from the main cooking area but also from the entrance of the kitchen. This allows for convenient unloading of groceries and quick access to ingredients during meal preparation.
Applying the Work Triangle to Different Kitchen Layouts
The work triangle can be adapted to various kitchen layouts, including:
- L-Shaped Kitchen: This versatile layout fits well into corner spaces and can accommodate multiple cooks. In an L-shaped kitchen, the work triangle can be efficiently implemented by placing the refrigerator at one end of the “L,” the stove along one wall, and the sink at the corner or along the other wall.
- U-Shaped Kitchen: Maximizes counter space and is ideal for larger kitchens with plenty of room to work. In a U-shaped layout, the three points of the work triangle can be distributed along the three walls, creating an efficient workflow.
- Galley Kitchen: Well-suited for small rectangular spaces, with appliances and cabinets running parallel on both sides. In a galley kitchen, the work triangle can be adapted by placing the refrigerator and sink on one side and the stove on the opposite wall.
- Island Kitchen: Popular for entertaining, this layout incorporates a central island for additional workspace and storage. The island can house one of the work triangle elements, such as the sink or cooktop, while the other two are positioned along the perimeter.
- Peninsula Kitchen: Perfect for smaller open-plan homes and apartments, creating a definitive space between the kitchen and living areas. The peninsula can serve as one point of the work triangle, with the other two elements positioned along the adjacent walls.
I found this lovely overview of the work triangle from VEVANO Home and think it perfectly symbolizes the importance of planning a proper kitchen.
When applying the work triangle to your chosen layout, consider the following tips:
- In an L-shaped kitchen, place the sink near a window for natural light and ventilation. This not only makes dishwashing more pleasant but also allows you to keep an eye on outdoor activities or children playing in the backyard.
- For U-shaped kitchens, ensure there’s at least 3 feet of clearance between opposing countertops. This provides ample space for multiple cooks to work comfortably and allows for easy movement within the kitchen.
- In galley kitchens, aim for 4 to 6 feet of space between parallel countertops. This width allows for efficient use of space while preventing the kitchen from feeling cramped.
- When incorporating an island, consider using it to house one of the work triangle elements, such as the sink or cooktop. This can help create a more open and social kitchen layout.
- For peninsula kitchens, ensure that the work triangle doesn’t create a traffic bottleneck. Consider placing the sink or cooktop on the peninsula to maintain an efficient workflow.
Remember that while the work triangle is a useful guideline, it should be adapted to suit your specific needs and preferences. Modern kitchens often incorporate additional work zones, such as a dedicated baking area or a coffee station, which may require adjustments to the traditional triangle concept.
Beyond the Work Triangle: Modern Kitchen Zones
While the work triangle remains a valuable concept, modern kitchen design often incorporates additional zones to accommodate various activities and multiple users. Consider incorporating these zones into your kitchen layout:
- Prep Zone: A dedicated area for food preparation, ideally with ample counter space and easy access to utensils, cutting boards, and small appliances.
- Cooking Zone: Centered around the stove and oven, this zone should include space for pots, pans, and cooking utensils.
- Cleaning Zone: Focused on the sink and dishwasher, this area should have space for sorting and rinsing dishes, as well as storing cleaning supplies.
- Storage Zone: This includes pantry space, cabinets, and drawers for storing food, dishes, and kitchen equipment.
- Dining Zone: If space allows, consider incorporating a casual dining area within the kitchen, such as a breakfast nook or island seating.
- Beverage Zone: A dedicated area for coffee makers, tea kettles, and other drink-related appliances and supplies.
By considering these additional zones alongside the traditional work triangle, you can create a kitchen layout that accommodates a wider range of activities and users, making your kitchen more versatile and functional.
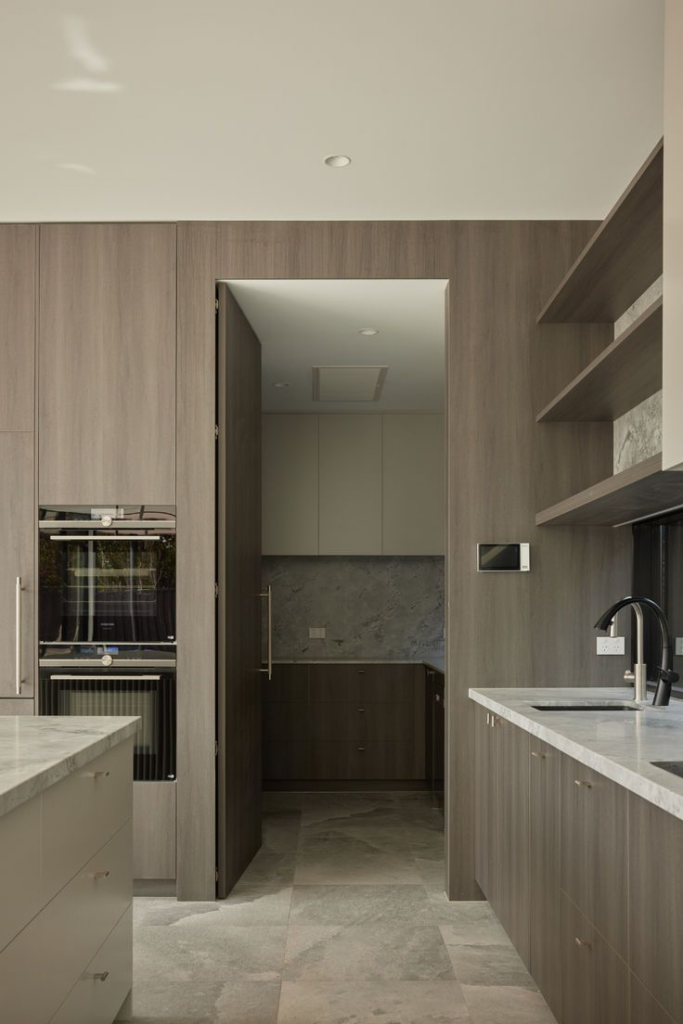
Another perfect option is hiding a separate prep-kitchen behind cabinet doors in your main kitchen! So handy and helpful, perfect to hide a pantry and kitchen in one space.
Storage Optimization
Efficient storage is crucial for maintaining an organized and functional kitchen. By maximizing your storage potential, you can keep your countertops clutter-free and ensure that everything you need is easily accessible. A well-organized kitchen not only looks better but also makes cooking and meal preparation more enjoyable and efficient.
Cabinetry Considerations
When planning your kitchen layout, consider the following cabinet options:
- Floor-to-ceiling cabinets: Utilize vertical space by installing cabinets that reach the ceiling, providing ample storage for less frequently used items. These tall cabinets can be particularly useful for storing large appliances, bulk purchases, or seasonal items that don’t need to be accessed daily.
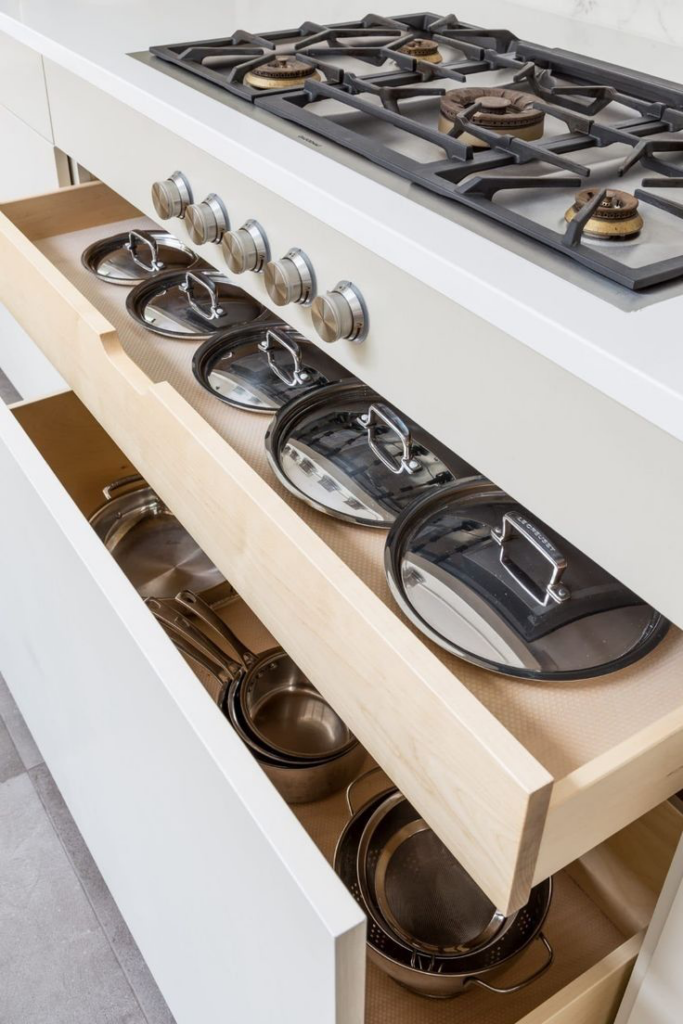
- Deep drawers: Opt for deep drawers instead of lower cabinets for easier access to pots, pans, and other large items. Deep drawers allow you to see and reach items at the back more easily than traditional cabinets with shelves.
- Corner solutions: Maximize corner spaces with lazy Susans or pull-out organizers to make hard-to-reach areas more accessible. Corner cabinets can be tricky to utilize effectively, but with the right organizers, you can turn these potentially awkward spaces into valuable storage areas.
- Open shelving: Incorporate open shelves for frequently used items or decorative displays, adding visual interest to your kitchen. Open shelving can make a small kitchen feel more spacious and provide easy access to everyday items.
- Custom cabinetry: Consider custom-built cabinets to maximize every inch of available space in your kitchen. Custom solutions can be particularly beneficial in kitchens with unusual layouts or specific storage needs.
- Glass-front cabinets: Use glass-front cabinets to display attractive dishware or glassware, adding depth and interest to your kitchen design. These cabinets can also make a small kitchen feel more open and airy.
- Toe-kick drawers: Utilize the space beneath your lower cabinets by installing toe-kick drawers. These can be perfect for storing rarely used items or flat objects like baking sheets and cutting boards.
Functional planning is super important and makes a big part of the kitchen design and functionality. By planning cabinets correctly and including all items that YOU need in your own home, your daily use will be much easier and you’ll be able to live much more clutter free when everything has its own space.
Smart Storage Solutions
Implement these clever storage ideas to make the most of your kitchen space:
- Vertical dividers: Use vertical dividers in cabinets to store baking sheets, cutting boards, and trays. This keeps these items neatly organized and easily accessible.
- Door-mounted organizers: Utilize the inside of cabinet doors for storing spices, cleaning supplies, or small utensils. This often-overlooked space can provide valuable additional storage.
- Pull-out pantry: Install a narrow pull-out pantry for easy access to dry goods and canned items. This type of pantry makes it easy to see and reach items that might otherwise get lost at the back of deep shelves.
- Drawer organizers: Use drawer organizers to keep utensils, cutlery, and small kitchen tools neatly arranged. This not only makes items easier to find but also prevents drawers from becoming cluttered and difficult to close.
- Stackable containers: Invest in stackable, clear containers for storing dry goods and leftovers in the pantry and refrigerator. Clear containers make it easy to see what you have on hand, while stackability maximizes vertical space.
- Magnetic knife strip: Install a magnetic knife strip on the wall to keep knives easily accessible and free up drawer space. This also adds a professional touch to your kitchen decor.
- Under-sink organizers: Maximize the space under your sink with pull-out organizers or tiered shelving units. This area can be used to store cleaning supplies, trash bags, and other household items.
- Pegboard storage: Install a pegboard on a free wall to hang pots, pans, and utensils. This not only provides easy access to frequently used items but also adds a decorative element to your kitchen.
- Hanging pot rack: If you have the ceiling height, consider installing a hanging pot rack above an island or peninsula. This frees up cabinet space and keeps pots and pans within easy reach.
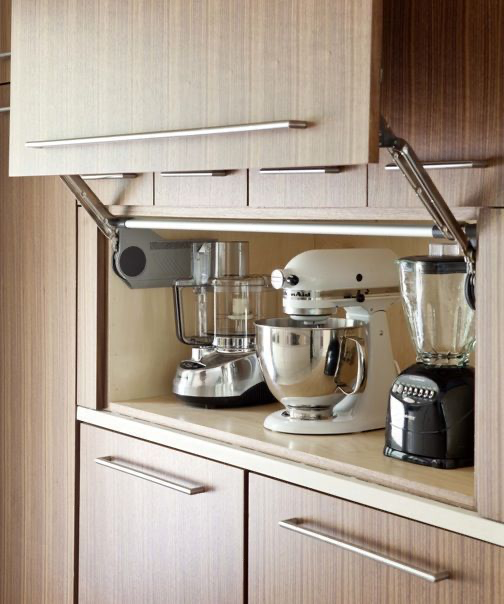
- Appliance garage: Create a dedicated space to store small appliances like toasters, blenders, and coffee makers. An appliance garage keeps these items easily accessible while maintaining a clutter-free countertop.
Hide all different kinds of appliances behind closed doors. This will lead to your kitchen being much neater, cleaner and better to use.
Appliance Placement
Consider the placement of your appliances when planning your storage:
- Position the refrigerator near the kitchen entrance for easy access when unloading groceries. This placement also allows family members to access snacks and drinks without disturbing the main cooking area.
- Place the dishwasher close to the sink for convenient loading and unloading. Ideally, position it to the left or right of the sink, depending on your dominant hand, to make the transfer of dishes as efficient as possible.
- Install a microwave at a comfortable height, either built into cabinetry or on a dedicated shelf. Consider the users’ heights when determining the ideal placement to ensure easy and safe access.
- If you have a stand mixer or other heavy appliances, consider creating a lift-up shelf or pull-out platform to store them. This allows you to use these appliances without having to lift them onto the counter each time.
- For coffee enthusiasts, create a dedicated coffee station with easy access to mugs, filters, and other accessories. This can be a built-in area or a designated countertop space with appropriate storage above or below.
By carefully planning your storage solutions, you can create a kitchen that not only looks organized but also functions efficiently, making cooking and meal preparation a more enjoyable experience.
Maximizing Storage in Small Kitchens
If you’re working with a small kitchen, consider these additional storage tips:
- Use the inside of cabinet doors: Install hooks or small racks on the inside of cabinet doors to hang measuring cups, spoons, or other small items.
- Utilize the sides of cabinets: Install narrow shelves or magnetic strips on the sides of cabinets to store spices or small containers.
- Invest in multi-functional furniture: Choose a kitchen table with built-in storage or a rolling cart that can provide additional counter space and storage when needed.
- Make use of ceiling space: Install a pot rack or hanging baskets from the ceiling to store items without taking up valuable floor or counter space.
- Use space above cabinets: If your cabinets don’t reach the ceiling, use the space above them to store less frequently used items or decorative pieces.
- Opt for slimline appliances: Choose narrower, apartment-sized appliances to free up more space for storage and work areas.
By implementing these storage strategies, even the smallest kitchens can be organized and functional, making the most of every available inch.
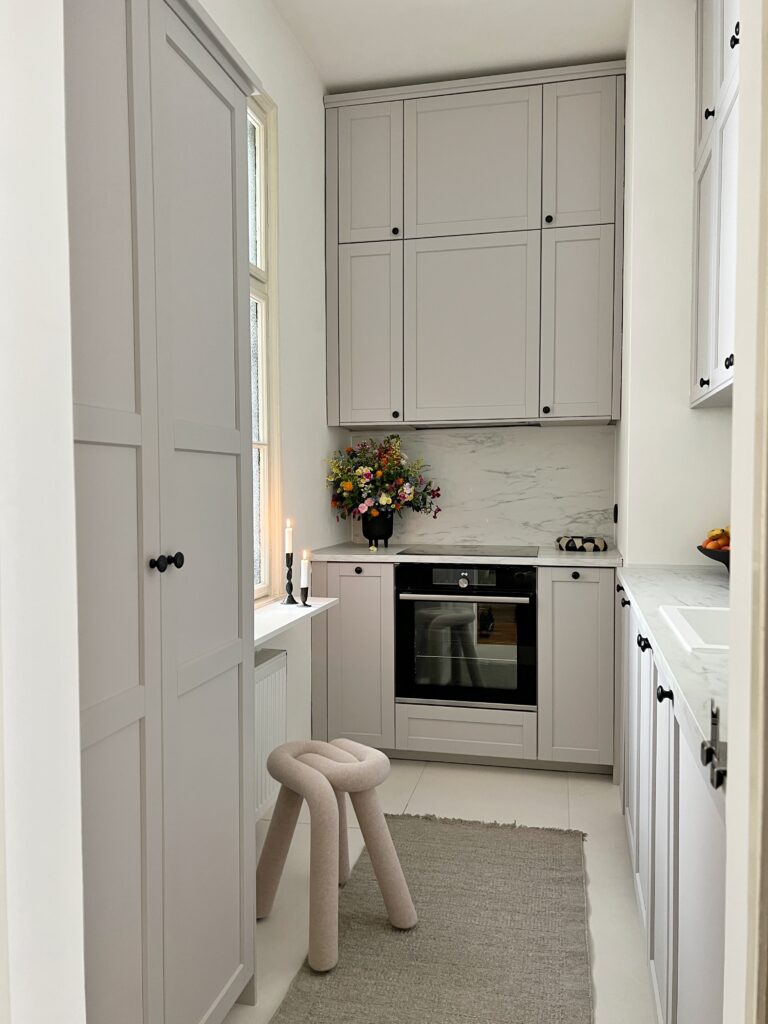
One of my favorite space optimizing kitchen hacks is using the space to the ceiling. In my own kitchen I changed that drastically and even though the worktop has become much bigger, my storage has become more. Therefore, I highly recommend planning the space up to the ceiling!
Ventilation Considerations
Proper ventilation is often overlooked in kitchen design, but it plays a crucial role in maintaining a comfortable and healthy cooking environment. Good ventilation helps remove odors, smoke, and excess heat, while also improving air quality and preventing the buildup of grease and moisture. Effective kitchen ventilation not only makes cooking more pleasant but also protects your home from potential damage caused by excess moisture and cooking byproducts.
Types of Kitchen Ventilation Systems
There are several types of ventilation systems to consider for your kitchen:
- Range Hoods: These are the most common type of kitchen ventilation, available in various styles such as under-cabinet, wall-mounted, or island-mounted. Range hoods come in different sizes and power levels to suit various kitchen layouts and cooking styles.
- Under-cabinet range hoods: These are installed beneath wall-mounted cabinets above the cooktop. They’re space-efficient and work well in smaller kitchens.
- Wall-mounted range hoods: These are mounted directly on the wall above the cooktop and are often used when there are no cabinets above the cooking area.
- Island range hoods: Designed for cooktops installed on kitchen islands, these hoods are mounted to the ceiling and often become a focal point of the kitchen design.
- Downdraft Ventilation: This system pulls air down and out through ducts beneath the floor, ideal for kitchen islands or where overhead ventilation is not possible. Downdraft systems can be built into the cooktop or rise from the countertop when in use.
- Ceiling-Mounted Ventilation: These systems are built into the ceiling and are particularly effective for open-plan kitchens. They can be less visually intrusive than traditional range hoods and work well in spaces with high ceilings.
- Heat Recovery Ventilation (HRV) Systems: These advanced systems extract warm air from the kitchen while pre-heating incoming fresh air, improving energy efficiency. While more complex and expensive to install, HRV systems can significantly improve overall home ventilation and energy performance.
- Ductless Ventilation: Also known as recirculating hoods, these systems filter the air and recirculate it back into the kitchen. While not as effective as ducted systems, they can be a good option when external venting is not possible.
Choosing the Right Ventilation System
When selecting a ventilation system for your kitchen, consider the following factors:
- Kitchen Size: The size of your kitchen will determine the capacity of the ventilation system you need. As a general rule, you should aim for 1 CFM (cubic feet per minute) of airflow per 100 BTUs of your cooktop’s output. For example, a 30-inch gas range with 50,000 BTUs would require a ventilation system with at least 500 CFM capacity.
- Cooking Habits: If you frequently cook with high heat or prepare foods with strong odors, you may need a more powerful ventilation system. Consider your cooking style and the types of cuisine you prepare most often when choosing a ventilation system.
- Ducted vs. Ductless: Ducted systems vent air outside, while ductless systems recirculate filtered air back into the kitchen. Ducted systems are generally more effective but require more installation work. Consider the following:
- Ducted systems are more effective at removing odors, smoke, and moisture.
- Ductless systems are easier to install and can be used in situations where external venting is not possible.
- Some systems offer both ducted and ductless options, allowing for flexibility in installation.
- Noise Levels: Look for ventilation systems with low noise ratings, especially if your kitchen is open to living areas. Noise levels are measured in sones, with lower numbers indicating quieter operation. As a reference:
- 1 sone is equivalent to the sound of a quiet refrigerator.
- 4 sones is about as loud as normal conversation.
- 8 sones is similar to the noise level of busy traffic.
- Energy Efficiency: Choose Energy Star certified models to reduce energy consumption and operating costs. These models are typically 20-30
Conclusion
Planning an effective kitchen layout is a complex but rewarding process that requires careful consideration of various elements, including the work triangle, storage optimization, and ventilation. By implementing these principles and adapting them to your specific needs and preferences, you can create a kitchen that not only looks beautiful but also functions efficiently.
Remember that while guidelines like the kitchen work triangle provide a solid foundation for your design, they should be flexible enough to accommodate your unique cooking style and lifestyle. Modern kitchen design often goes beyond the traditional work triangle to incorporate additional zones and features that cater to diverse needs and activities.
When it comes to storage, think creatively and utilize every available space. From innovative cabinet solutions to clever organizers, there are countless ways to maximize storage and keep your kitchen clutter-free. Remember that good organization not only improves the look of your kitchen but also enhances its functionality and makes cooking more enjoyable.
Proper ventilation is an often-overlooked aspect of kitchen design, but it’s crucial for maintaining a comfortable and healthy cooking environment. Choose a ventilation system that suits your cooking habits, kitchen size, and overall home design to ensure optimal performance and energy efficiency.
As you embark on your kitchen design journey, keep in mind that the ultimate goal is to create a space that inspires you to cook, entertain, and enjoy time with family and friends. Don’t be afraid to think outside the box and incorporate innovative solutions or cutting-edge technologies that suit your needs.
With thoughtful planning and attention to detail, you can transform your kitchen into the heart of your home – a place where functionality meets style, and where memories are made one meal at a time. Whether you’re working with a small galley kitchen or a spacious open-plan area, the principles outlined in this guide can help you create a kitchen that’s not just a place to cook, but a space to live, laugh, and create lasting memories.
Remember, the perfect kitchen is one that works for you. Take the time to consider your specific needs, preferences, and lifestyle when planning your layout. With careful consideration of the work triangle, storage solutions, and ventilation needs, you can create a kitchen that’s not only beautiful but also a joy to use every day.
Wanna read more? Check out these other blogposts: